Photography might sometimes be the tool we use to reproduce reality - but more often than not I enjoy techniques far more, that allow me to see something that is not obvious to the naked eye.
This is about one of these techniques - and I chose a creek only a few hundred meters from my home to try it out.
Long exposure photography - with a twist
I’m sure you know about the exposure triangle: Shutter speed, aperture and ISO depend on each other influencing the amount of light you capture. And you want to get the correct amount of light on your sensor in order to get a nice exposure.
So… to do a long exposure, we need a slow shutter speed: Ideally many seconds or even minutes! This is easy to do at night, of course, where we don’t have too much light anyway. Just put your camera on a tripod, expose for a few seconds - ideally with something highlighty (is this even a word?) moving in your frame, and you get yourself a nice long exposure:
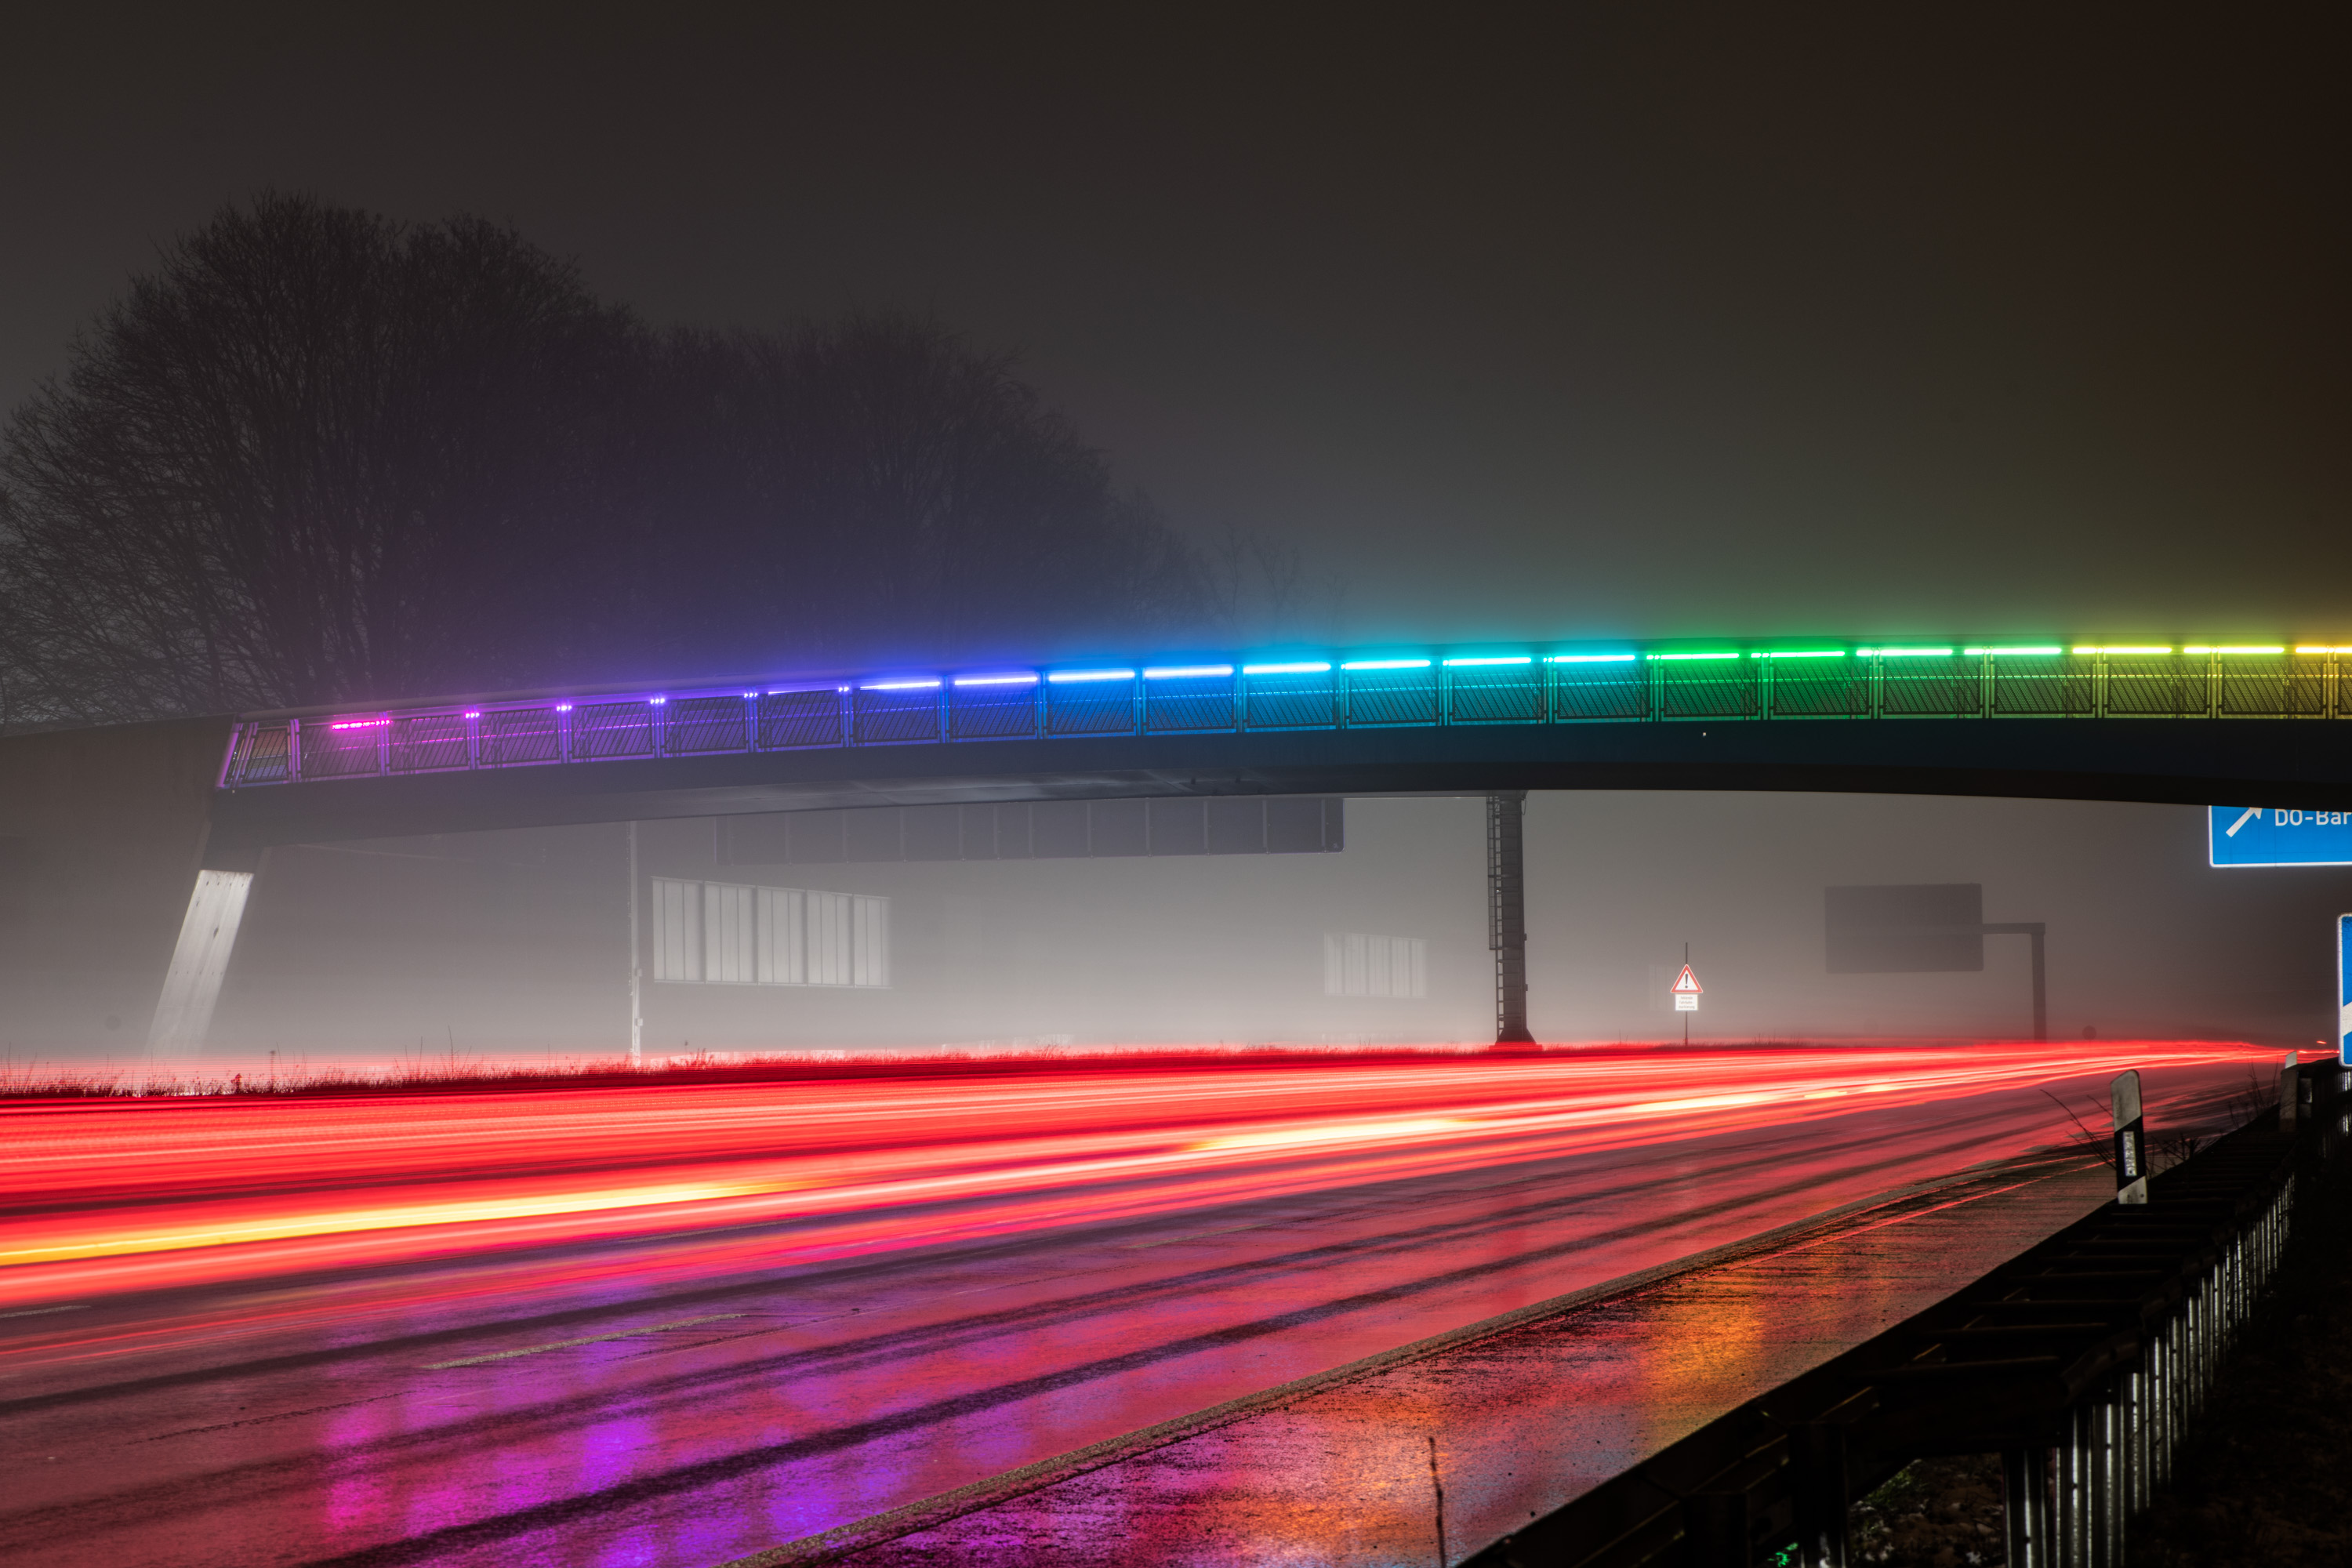
It’s so easy to do that at night - and you can do light painting using the same technique - but as you can see, the effect is only visible in the areas that are really bright (i.e. the lights of the cars) - not so much in the dark areas as on the cars themselves.
If we now want to have this effect on all the movement we have in a scene, with everything well-lit, we have to cheat. The reason is that we get so much light onto our sensor during our long exposure, that we can’t turn down our ISO or close the aperture enough to compensate. The solution is simple - we need sun glasses for our camera, and add an ND filter.
I hate filters.
Filters are good for one thing: Selling bullshit to people who just get started doing photography and get their money. You know the scene: In a big electronics store someone is picking out her first entry-level DSLR and within seconds there is a vulture-like salesperson explaining that “If you really want to get into the hobby, you need a UV filter and a polarization filter and this and that” because not only are they improving contrast and colors, but they are also protecting your lens! You should always leave them on no matter what!
I’m not a fan of adding additional glass or plastic into my path of light. It can only lessen quality, right, so why should I do this? There is no filter in the world that I would recommend to “always leave on the lens”.
If you want to protect your lens, be careful. And use a lens hood.
You don’t need an UV-Filter. You don’t need a polarization filter except if you are in a specific situation where you do. But an ND-Filter… is fine. For this situation at least. Buy a cheap one, don’t let someone tell you that it’s important to get a really expensive ND filter because of the color accuracy. Why should you mind? You can get a 15 € ND filter and fix the color in post processing instead of buying one for 200 € for a long exposure experiment.
Get a strong one.
Strong means “dark sunglasses”. ND filters are often measured in “stops”. One stop up or down just means double or half of the light reaches the sensor. And for photography like this I recommend a 10 stop ND filter. That halves the amount of light 10 times and makes it really dark - so only 1/1000 of the original light comes through. And that means, that you have a lot of breathing room to lengthen your exposure time again - that’s what we wanted, right?
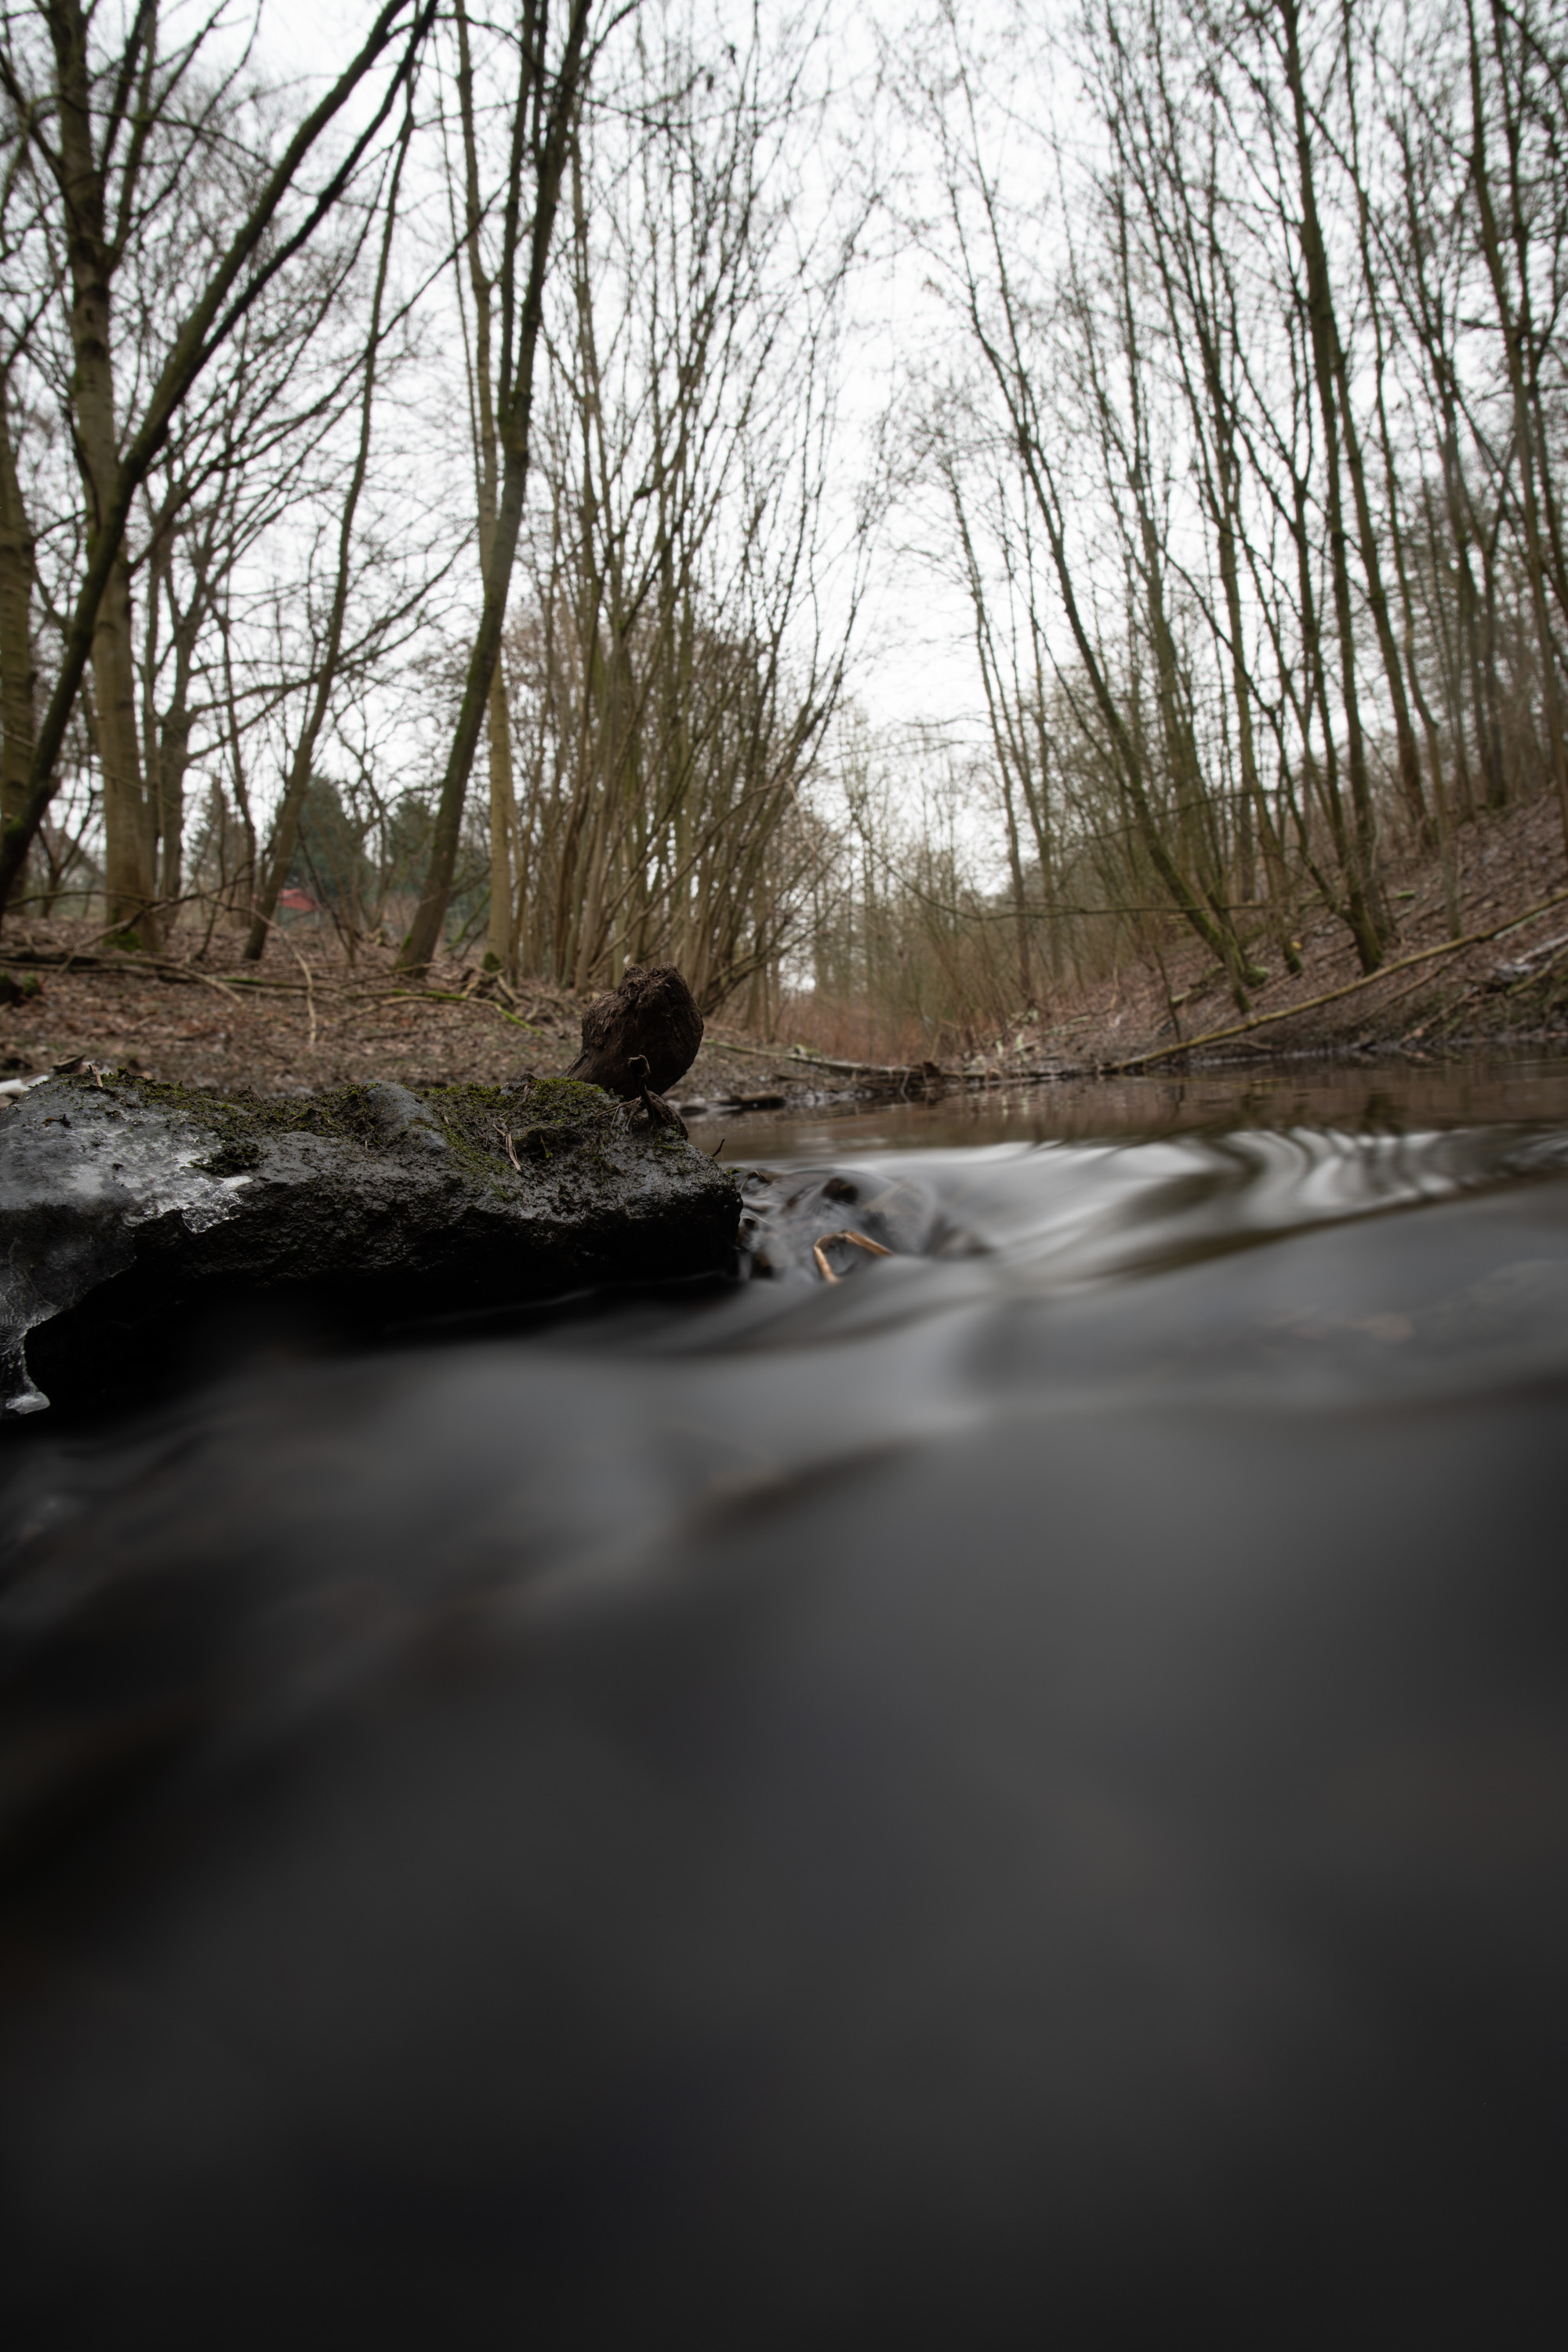
The result could look like this:

I did this with an exposure time of 1 minute and 18 seconds.
Painting with motion
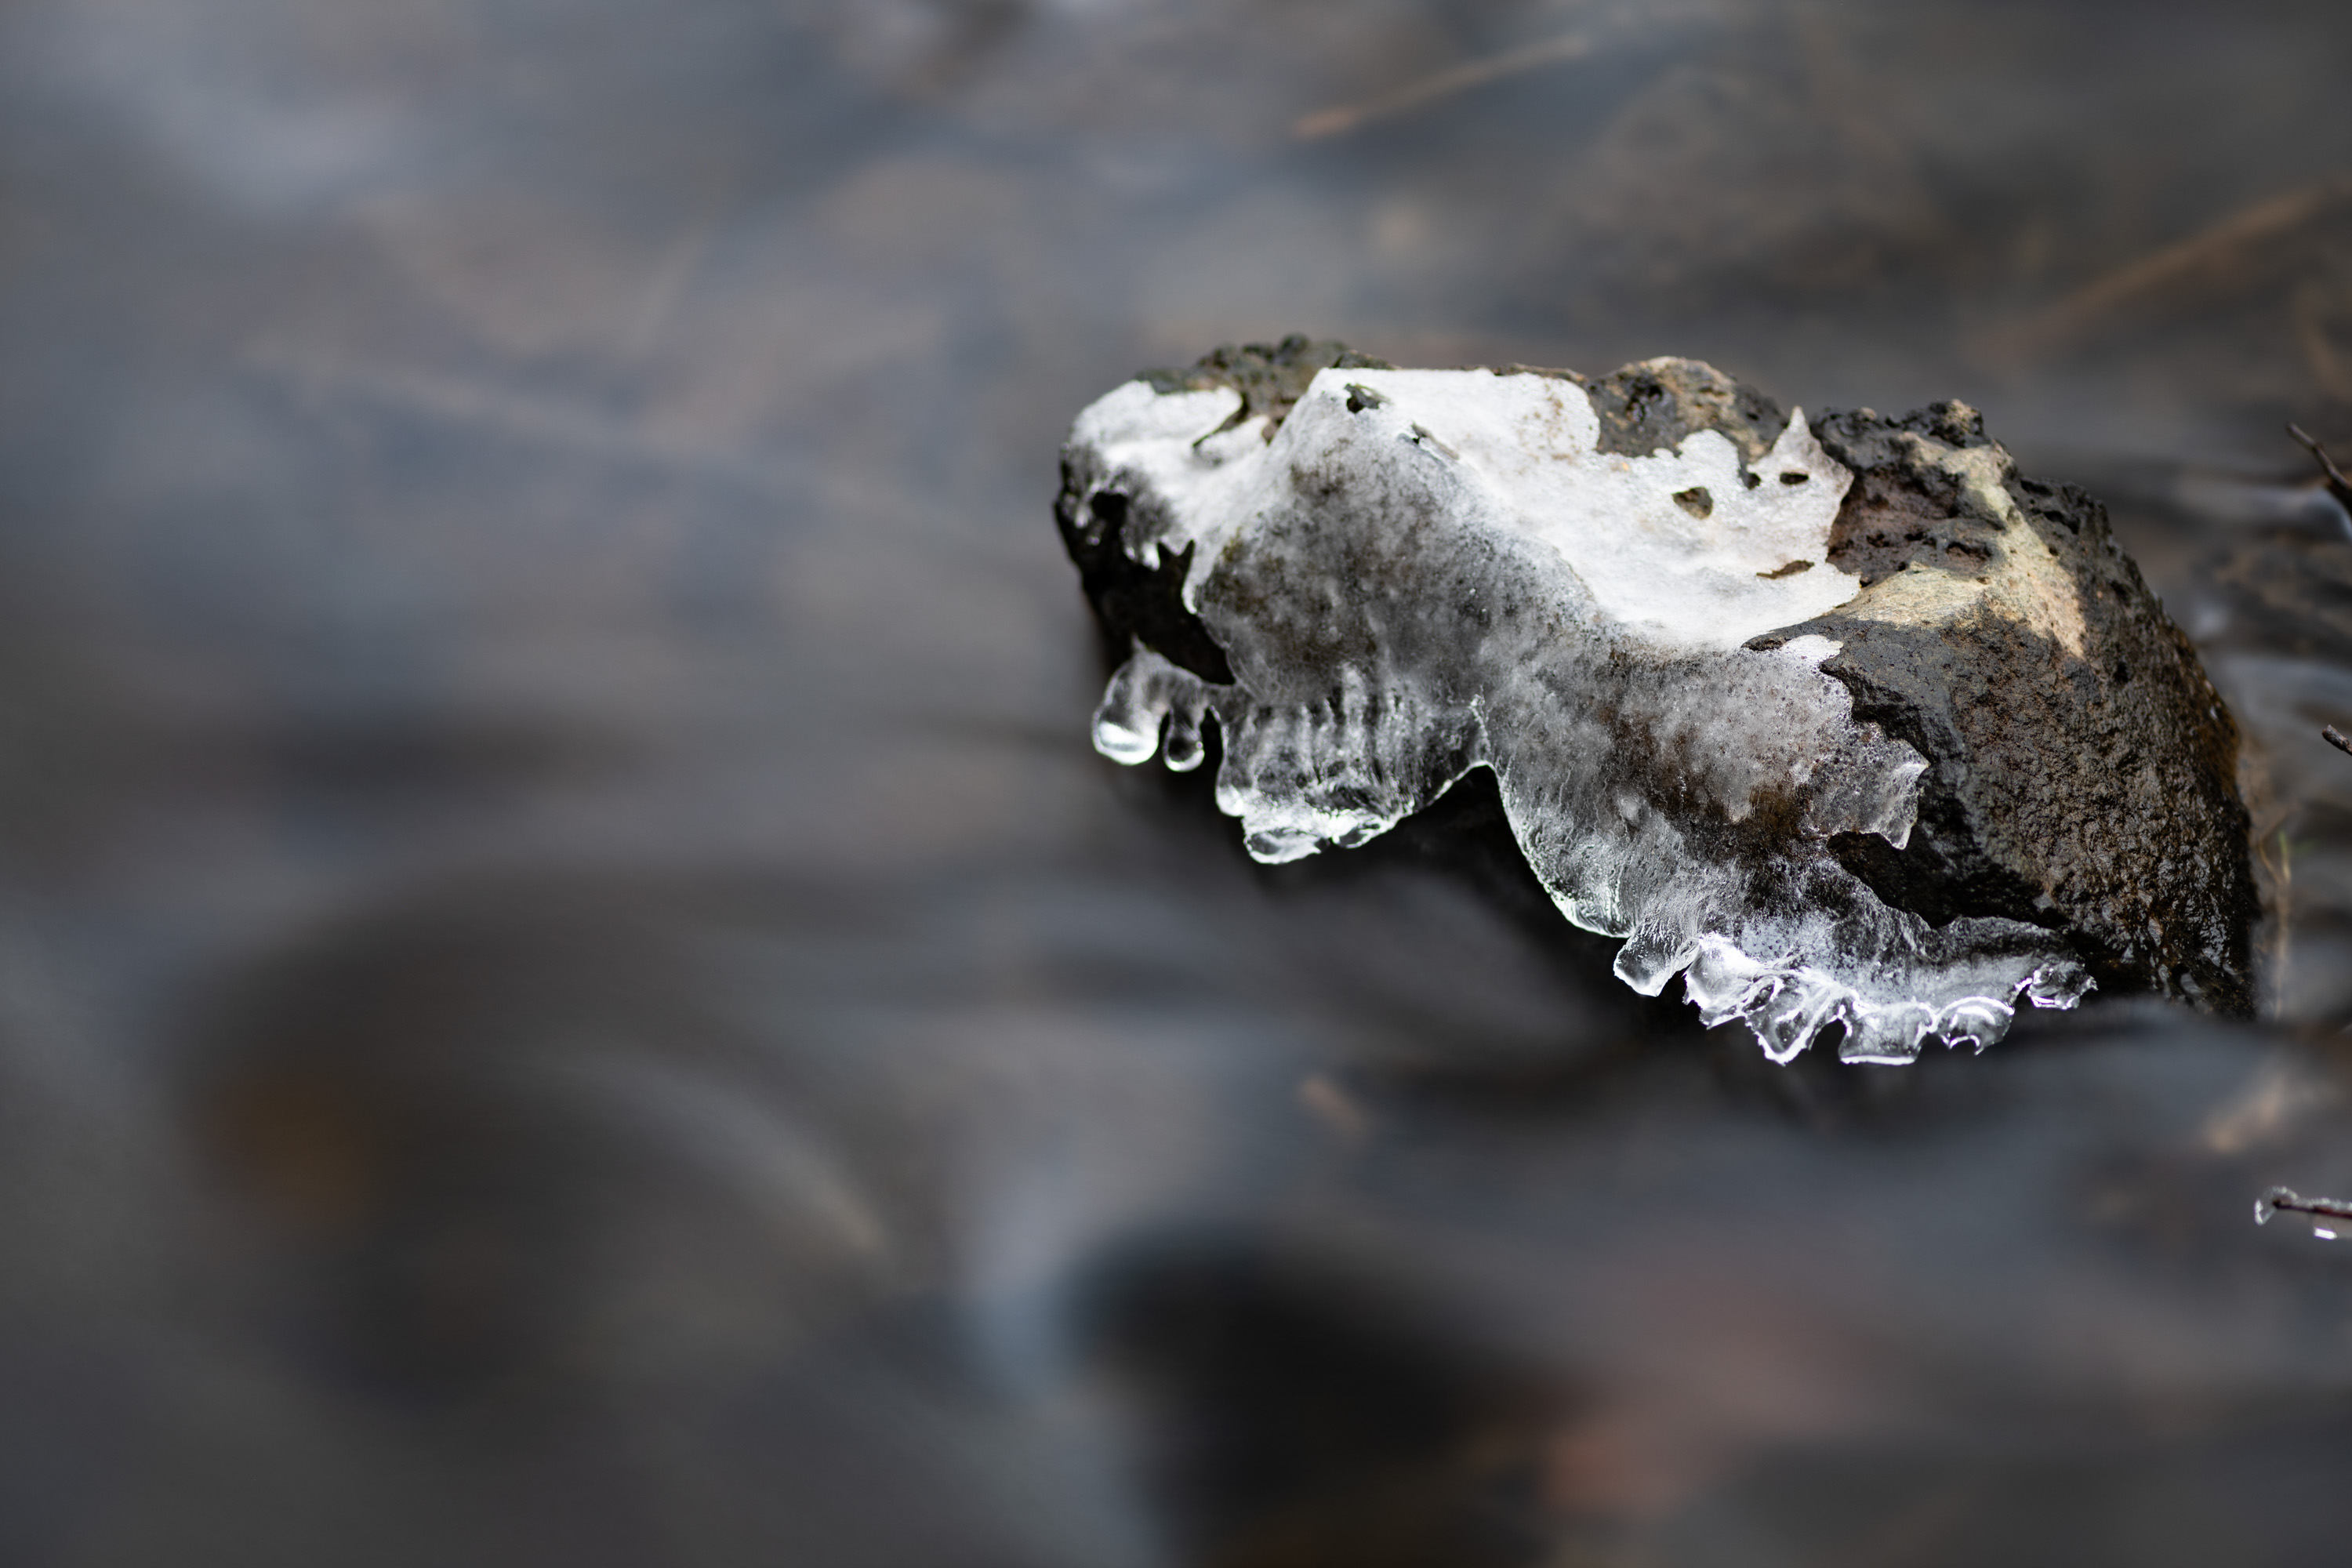
I really love the way the rocks sink into the silky water and I enjoy the contrast of “materials”. For me, it’s very interesting to wander around, paying attention to the characteristics of motions. Laminar flow in water for example - so a part of the stream that always takes the same path, without too much turbulence, looks smooth within itself, but it’s defining shape is kept, even in the long exposure. Very turbulent parts like the waterfalls in the title image at the very top blur into each other, generating an almost mist-like appearance.
It’s interesting for me to observe these motions, thinking about how it might look like in a long exposure, and see how wrong I was when I check the resulting picture ;)

Getting the shot
This might be cumbersome, but you’ll get used to it, so stick with me:
First, frame your shot. Get your camera in position, check that your perspective is the way you want it to be. After that, you need to go full manual:
Set your camera to manual mode (the one where you set exposure time and aperture yourself). Also, make sure you don’t have any automatic ISO adjustments enabled. This is a setting where the camera - even in manual mode - tries to raise the ISO if it thinks the picture is going to be too dark. And - with the ND filter you put on later it will be very dark! So turn that off. Otherwise, expose correctly, as if you wanted to take a photo like that and take note of your shutter speed.
And now: Maths. I know, it sucks, but there are apps for this. Look for “long exposure calculator” or something like that. I use this one for iOS but any other will do just fine. Put the in the exposure time you measured, and select the filter you use, and it will tell you the new exposure time.
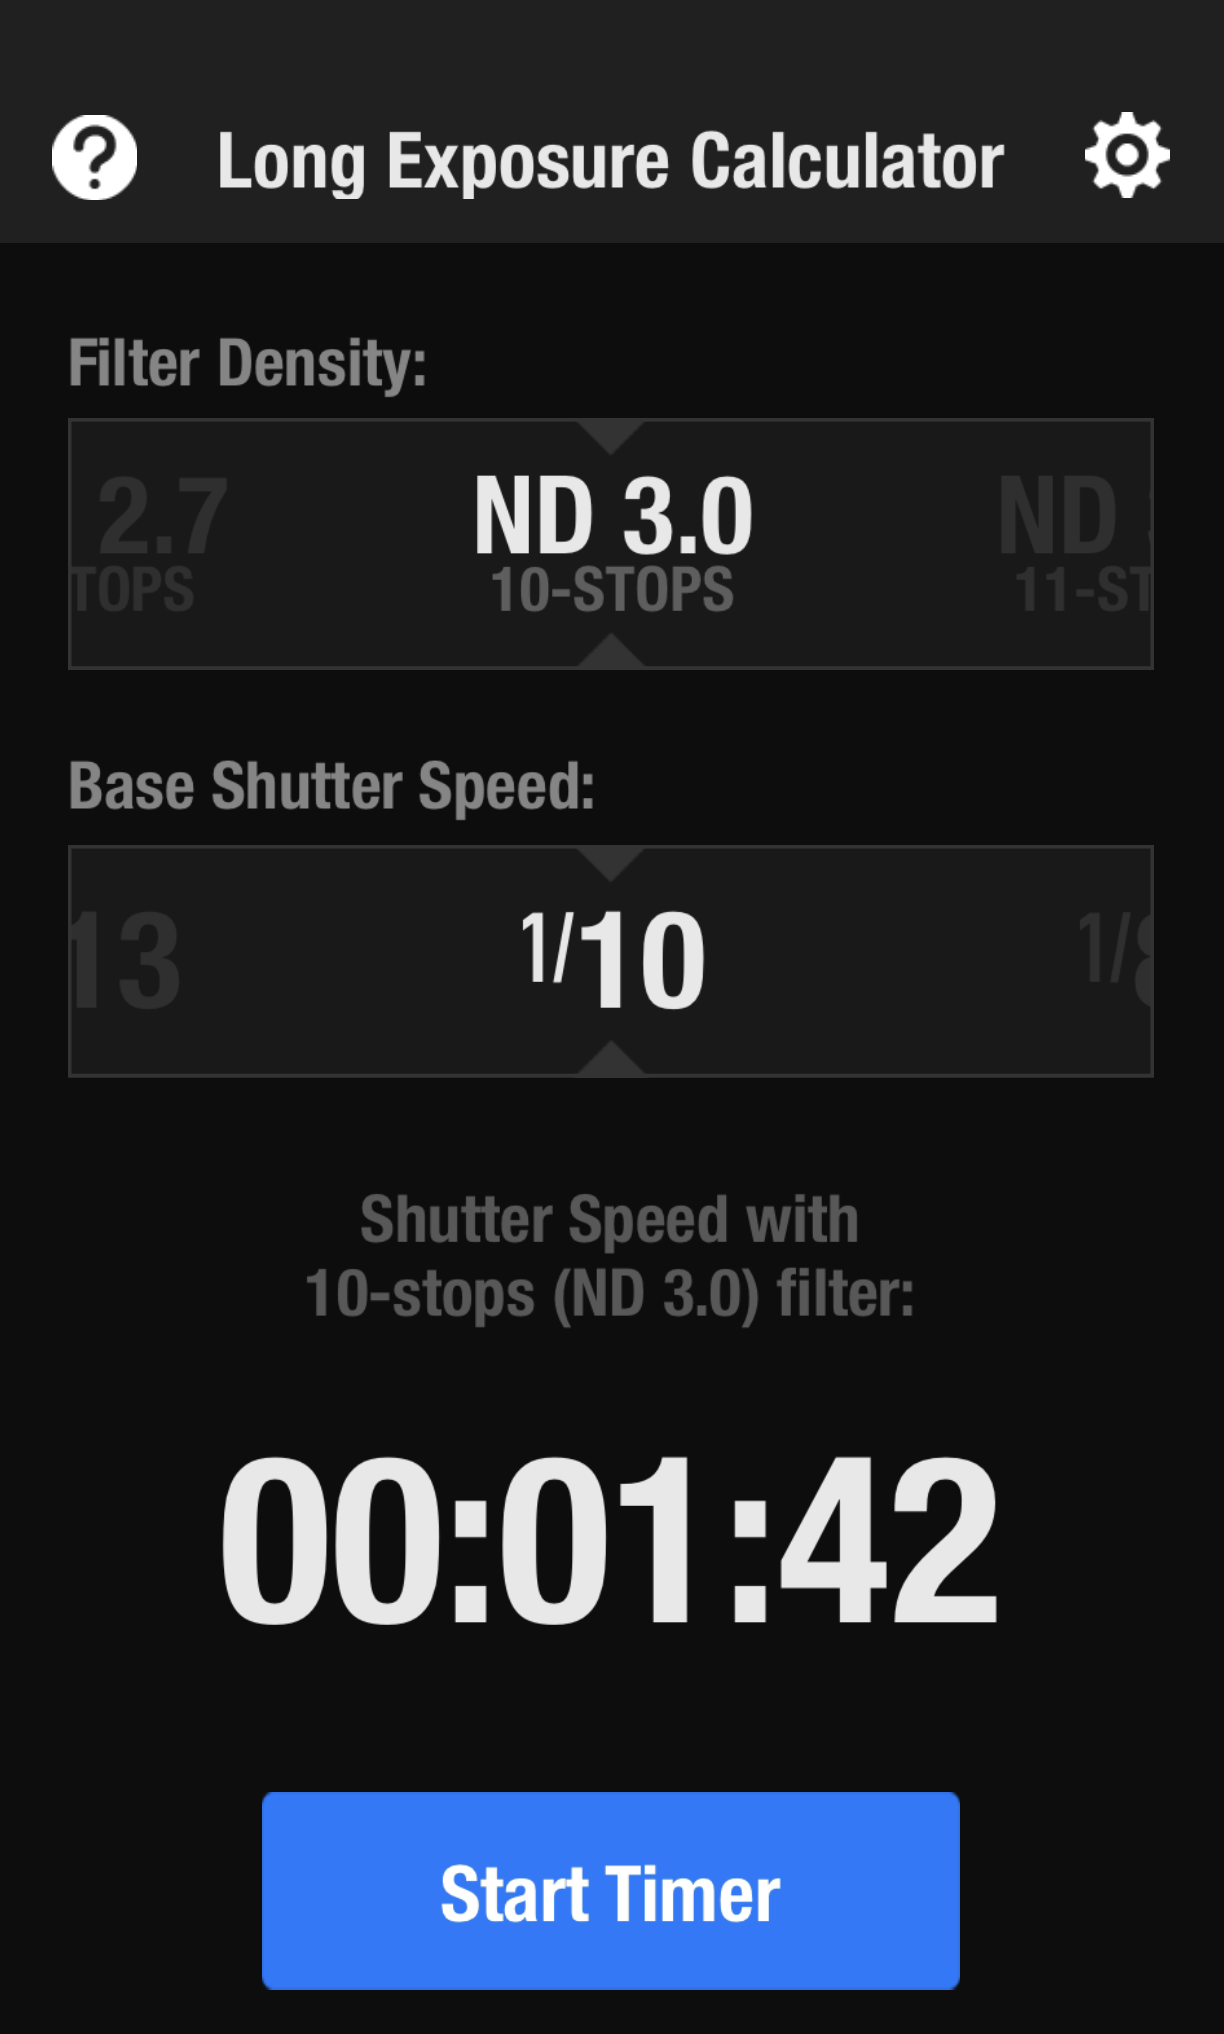
Play around with the values. If you think the new exposure time is too long, open the aperture or raise the ISO, check the new exposure time and recalculate. If you think it’s too short, do it the other way around.
When you’re satisfied, set the new exposure time. You won’t find the exact number in your normal exposure time settings, but there are some ways around that:
Almost every camera has a “bulb” mode which leaves the shutter open for as long as you keep the shutter pressed. This is best used with a remote (cable or radio), so you avoid shaking the camera by touching it.
Some current cameras have a “time” mode. It’s like “bulb”, but it starts the exposure while you press the shutter and stops it when you press it again.
Many cameras have a built-in intervalometer. Please check your manual - you can use it to do exact timed exposures, you just have to set it up via the screen of your camera.
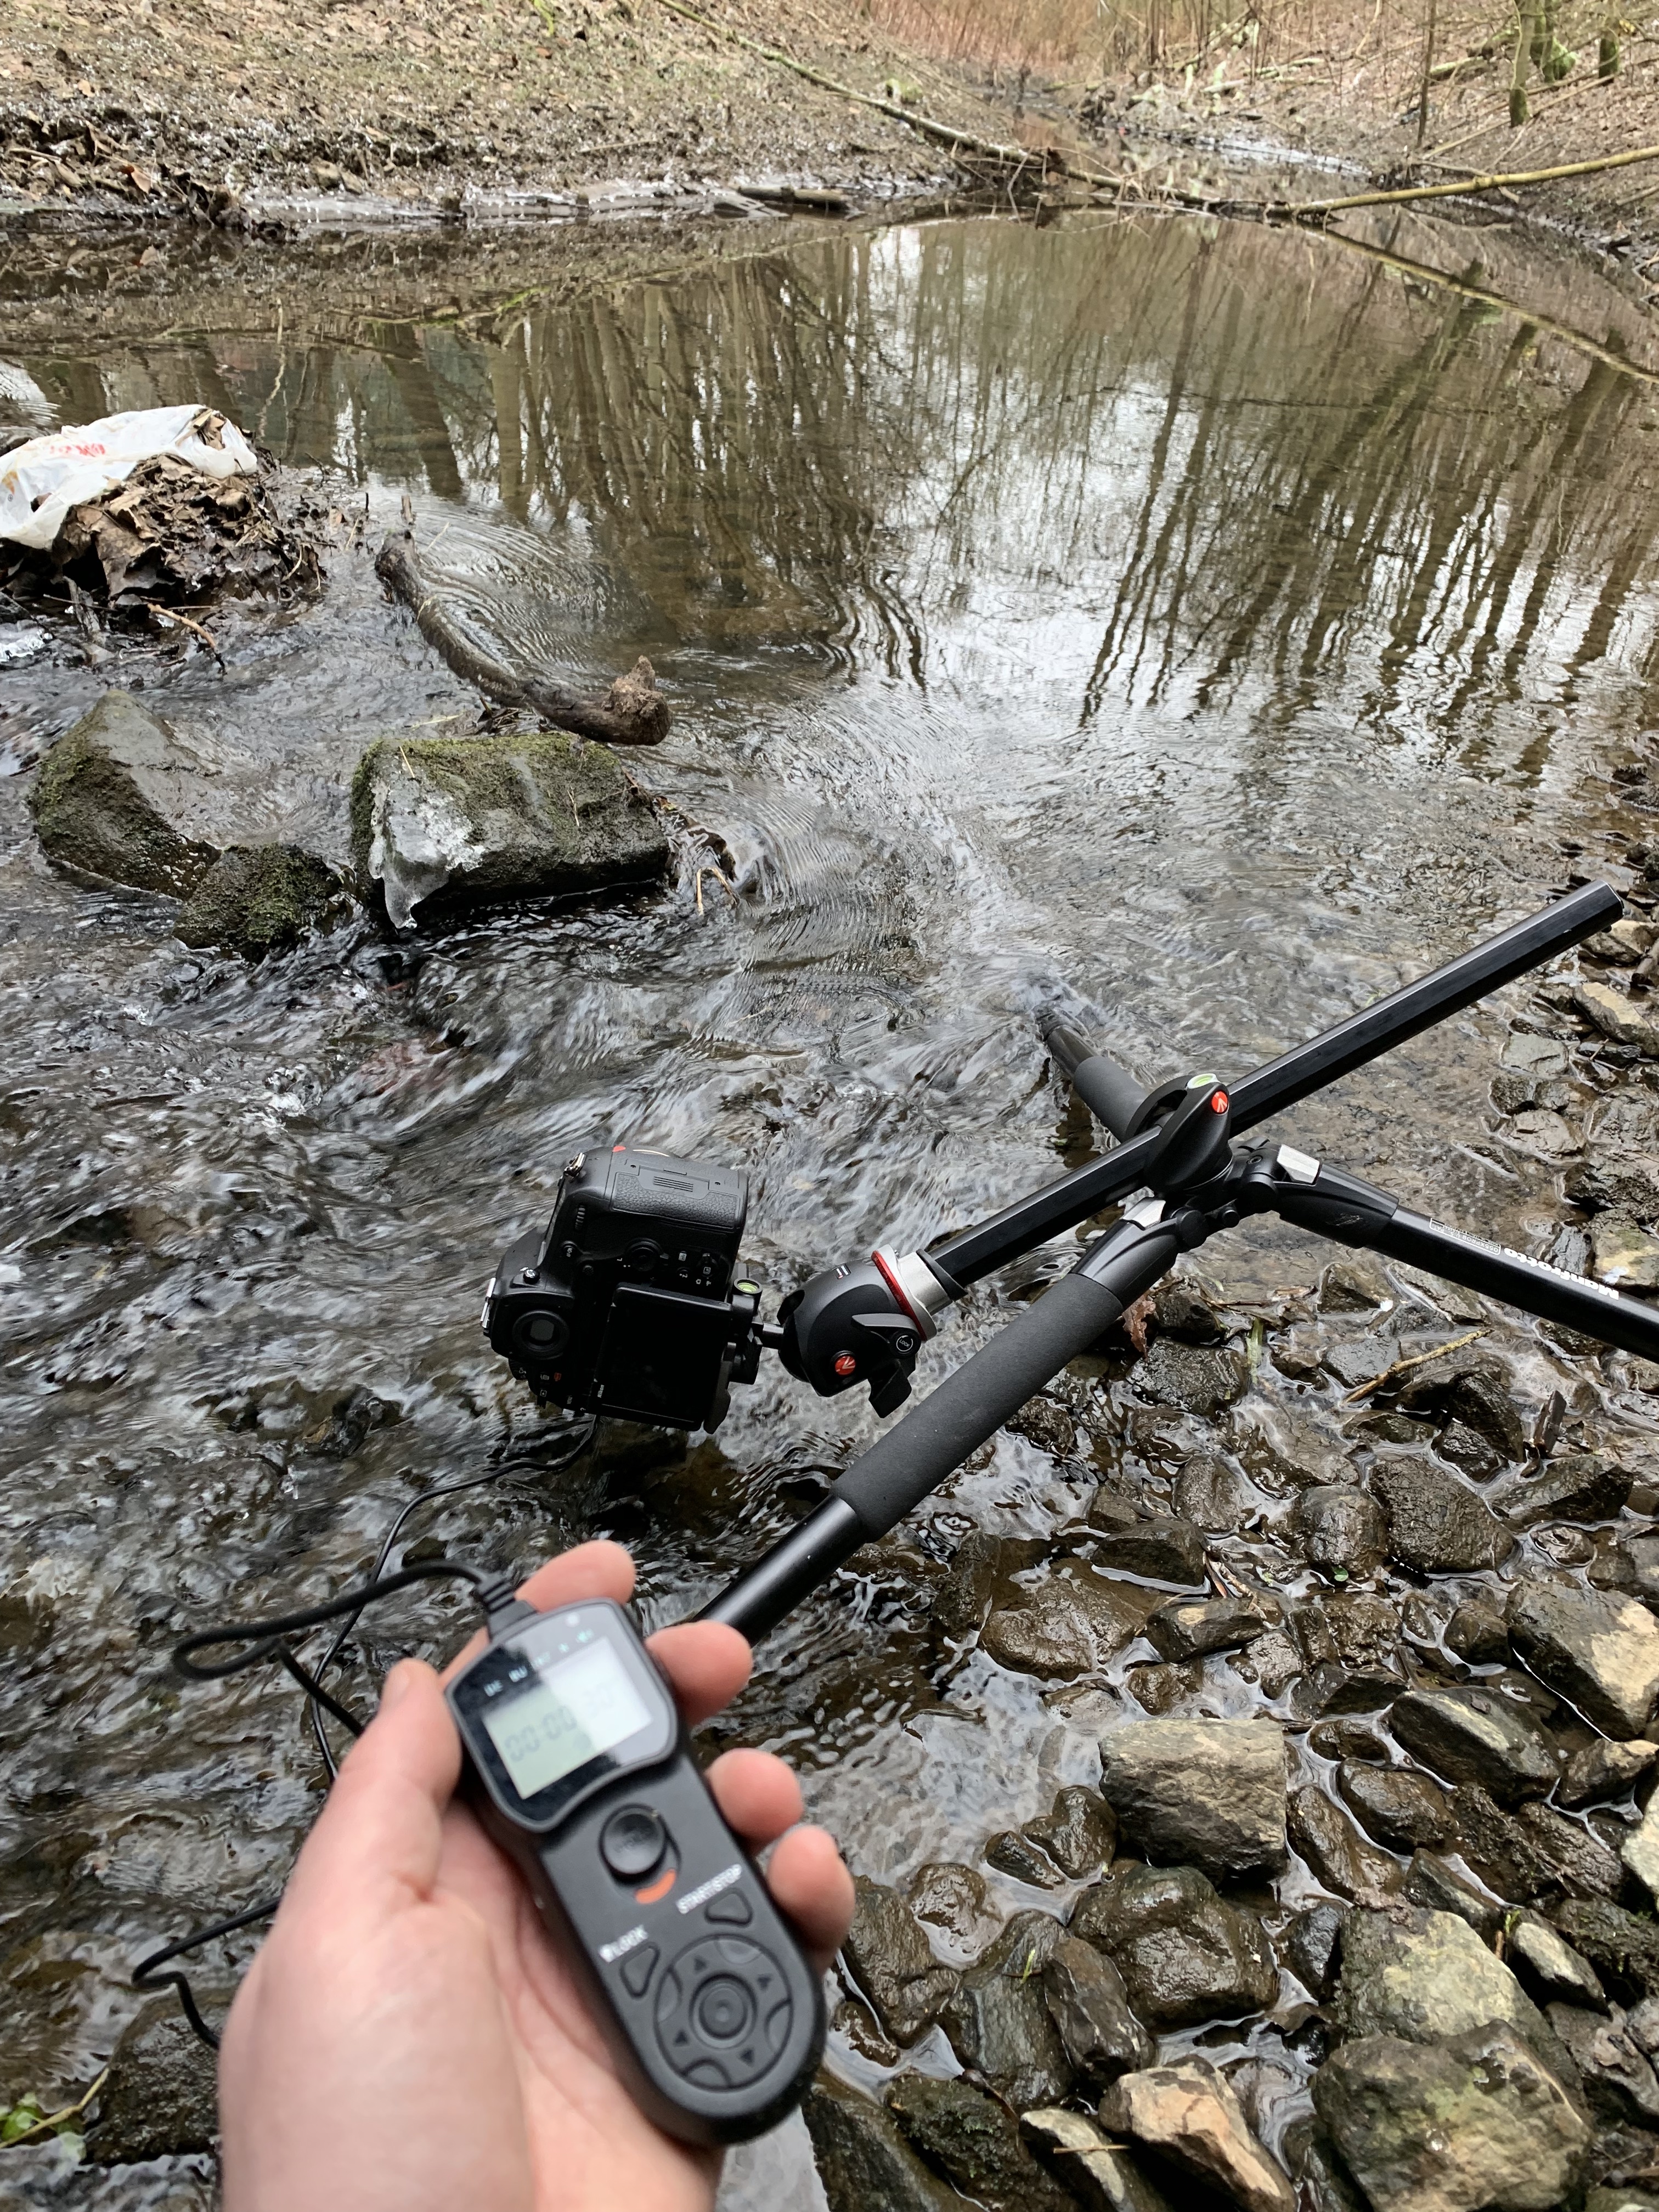
You can also buy an external intervalometer, they are not expensive and you avoid fiddeling with the camera once it’s set up. I use one here:
If you don’t use an intervalomenter - built-in or otherwise - you need a timer. You can use your phone for that, and most long exposure calculator apps have one built in.
So - you chose your method and set everything up? Then make sure your focus is where you want it and then switch to manual focus. You don’t want to re-focus with the ND filter on, because your camera won’t be able to see anything and while hunting for focus again it will loose it.
After that, carefully (without messing up the composition or focus) attach your ND filter. And take the picture!
Gear to help you out
As for everything long exposure a sturdy tripod is a great thing to have! Of course you can always improvise putting your camera on the ground or on a wall, a bean bag or wherever, but if you have a tripod, bring it. Obviously finding your crop is much easier this way and adjustments are less of an effort.
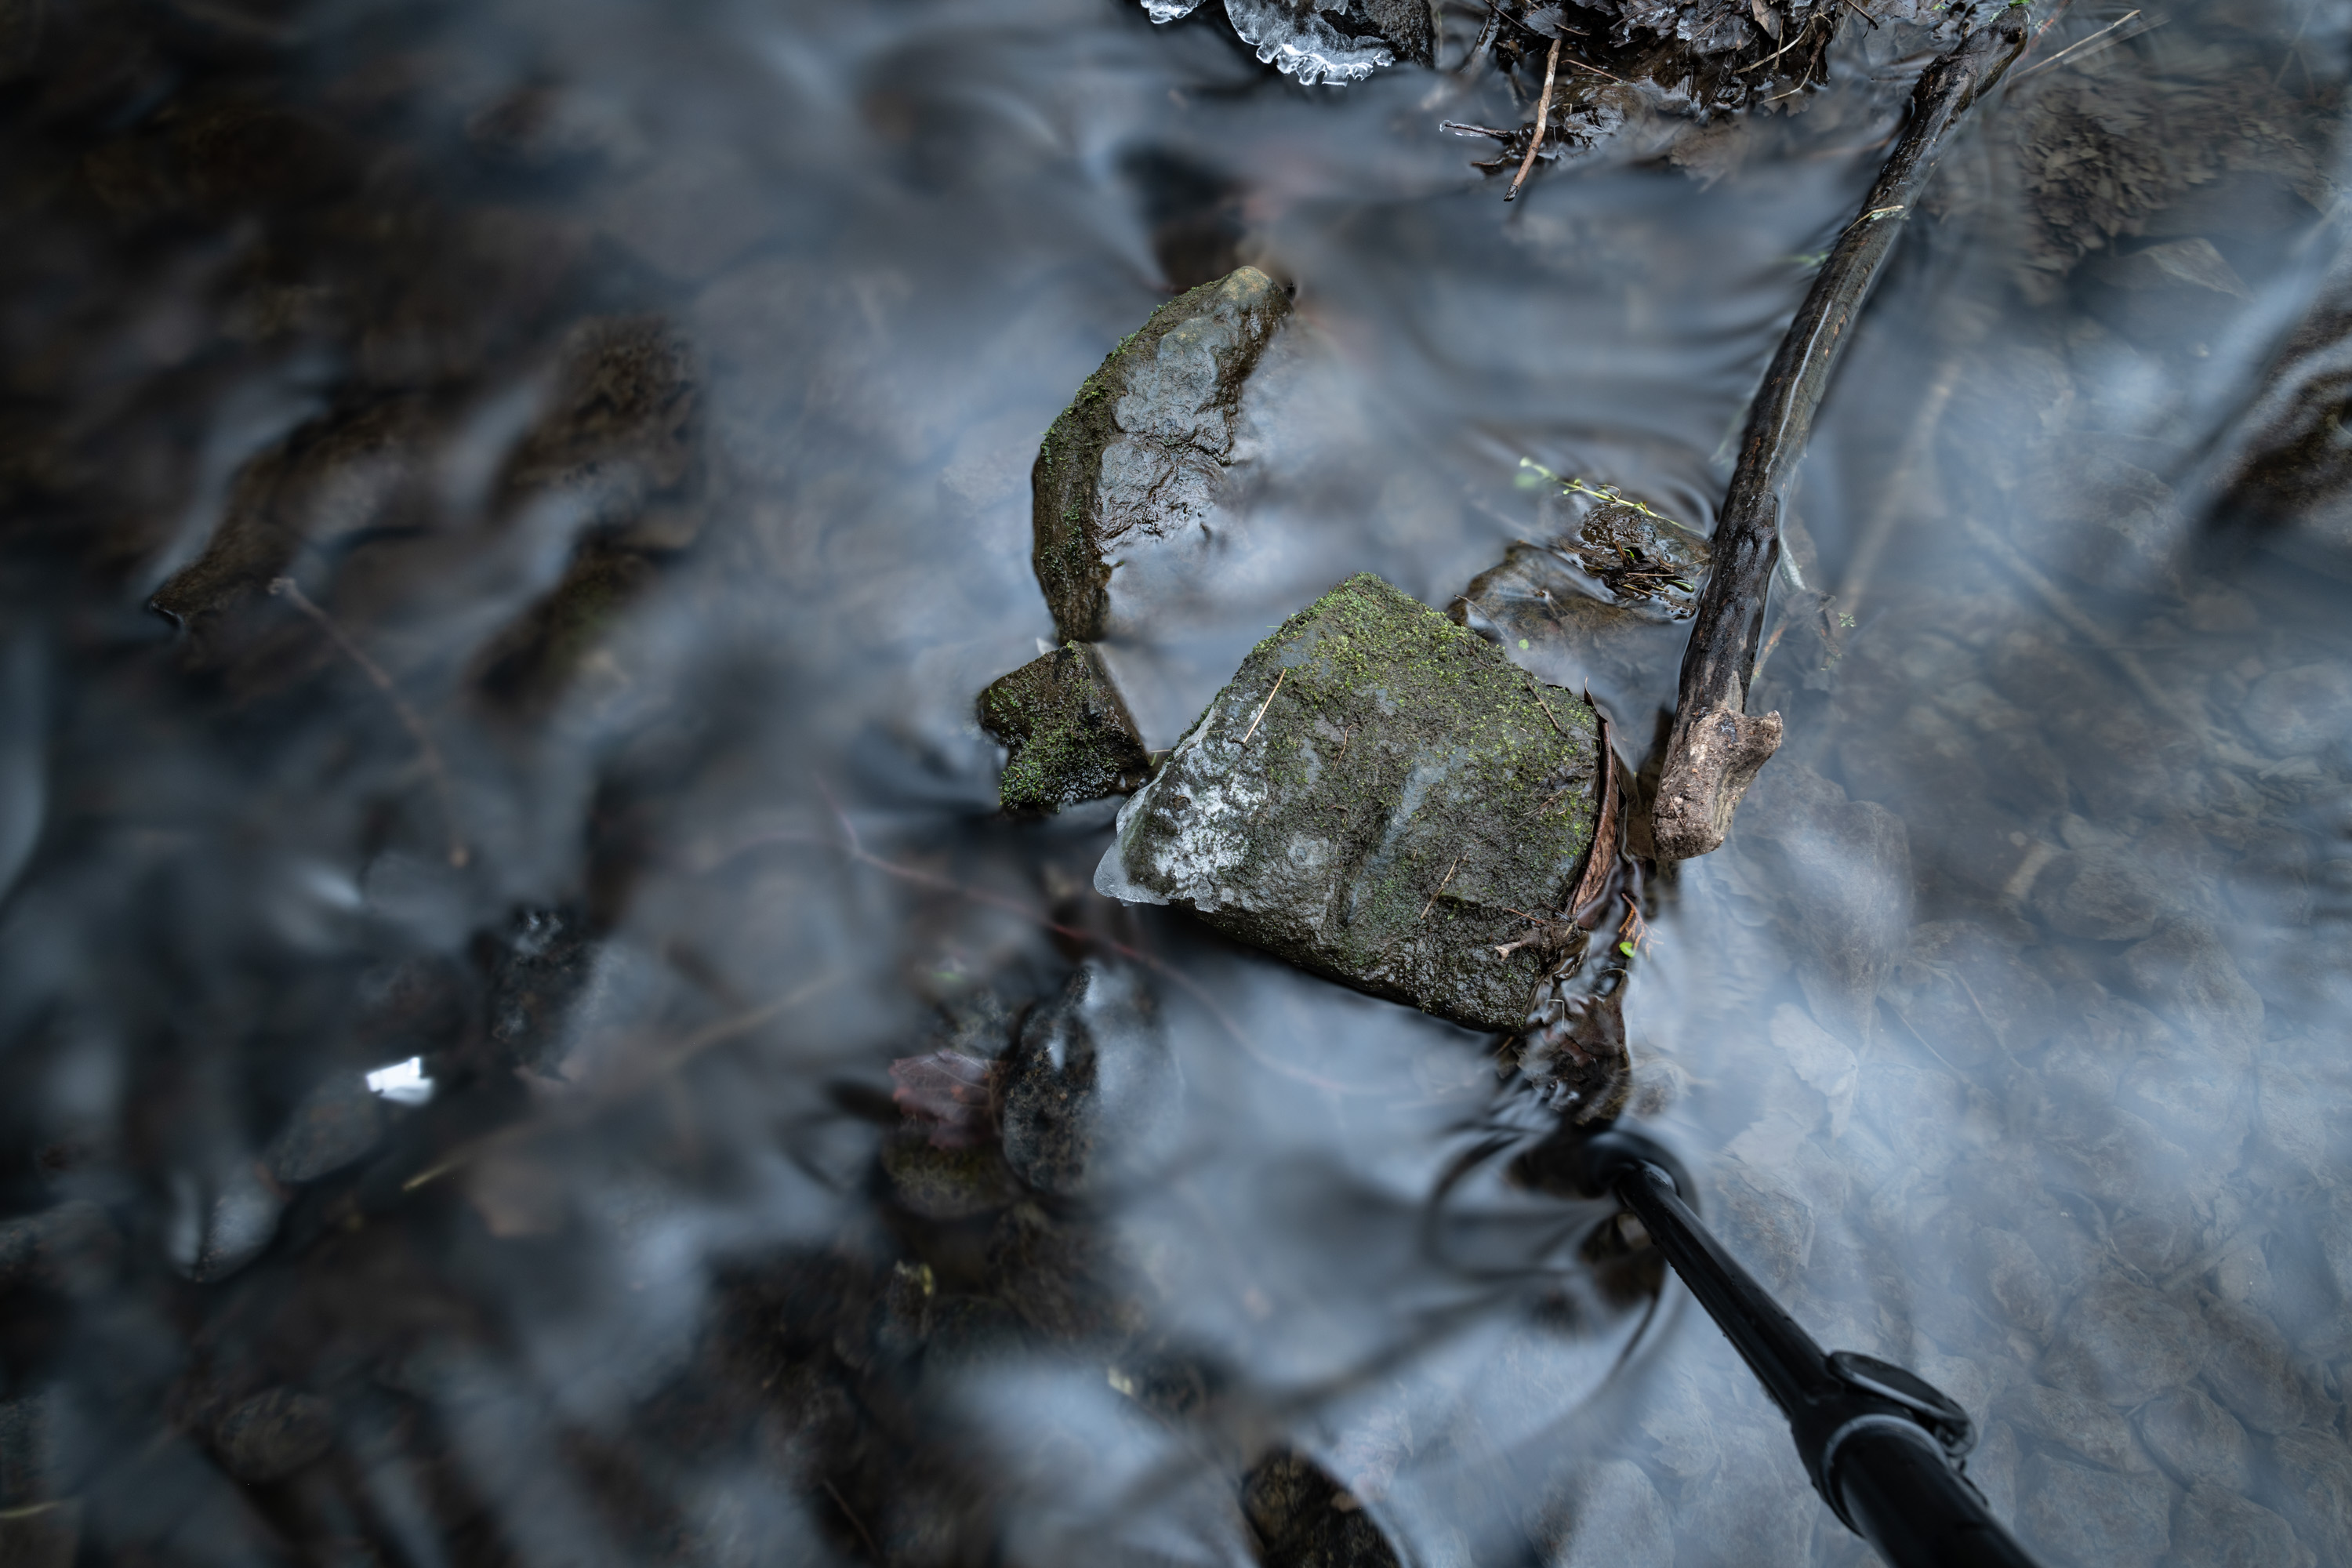
Also, a way to remotely trigger your camera is a good thing. The external intervalometer was nice in this case because I didn’t have to kneel in the water for more than a minute and I could change all relevant settings while standing up!
Thank you!
This is my attempt of getting back to blogging in 2020 - I hope you enjoy my content <3